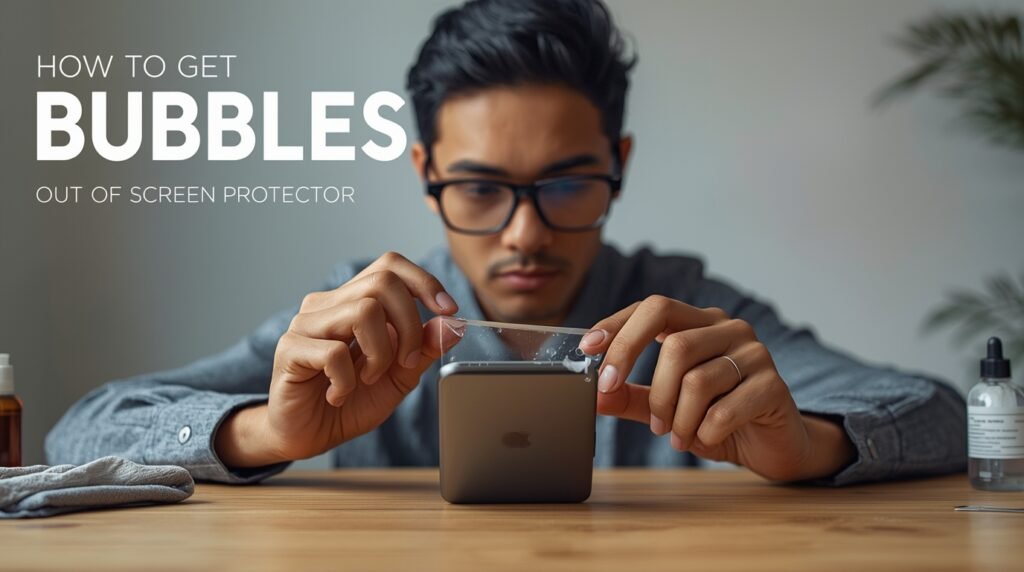
How to Get Bubbles Out of a Screen Protector
Smartphones’ worst feature is bubbles behind screen protectors. Small specks occur after washing, preparing, and pressing. All phone users must know how to remove bubbles from screen protectors. Bubbles may reduce touch sensitivity and collect dust.Many people want a simple way to fix screen protector bubbles without peeling. Air bubbles in phone screen protector films are common if dust or lint settles after installation. Even premium things are at danger without adequate tempered glass installation.
Luckily, this doesn’t need a pro to remove bubbles from screen protector. Learn about phone screen protect measures to improve results. Place screen protectors properly to avoid difficulties. Starting with microfiber cloths, dust stickers, or squeegees makes putting screen protectors without bubbles easier.Repair remove bubbles from screen protector without removing the layer with practice. We constantly try for a bubble-free, beautiful screen protector.
Why bubbles form under a screen protector
remove bubbles from screen protector by understanding why they arise. Most issues are caused by dust, misplacement, or rapid installation. Fixing screen protector bubbles may seem impossible with one lint.air bubbles in phone screen protector form when particles prevent adhesive from sticking evenly.
Poor tempered glass installation is a common reason. Not pressing evenly or lining the borders leaves air gaps. Many experts recommend reviewing simple phone screen protection tips first. Tidy your desk and wash your hands. Correct screen protector placement reduces side gaps.
Professional screen protectors may also prevent mistakes. With squeegees, microfiber wipes, and dust removers, you can apply screen protector quickly without bubbles remove bubbles from screen protector can be repaired without removal, although prevention is easier. With practice, you’ll get that flawless, bubble-free screen protector finish that protects and beautifies your phone.
Step-by-step guide: how to remove bubbles
Bubbles on screen protector layers may scare you, but a careful procedure may remove them. Turn off your phone and wash your hands. Screen protector bubble repair is harder with grease or dust on your hands. Check the issue. air bubbles in phone screen protector swap places. These release easily.
Push tempered glass from the middle out. Brush with a microfiber cloth or card tightly but softly. Wrapping a plastic card in a soft cloth to prevent pressing scratches phone screen protection tips . Since pressing at an angle maintains air, screen protector alignment is critical.
Lift one corner carefully if dusty. Use screen protector dust stickers to remove and reinstall particles. Avoid bubbles by pressing screen protector evenly again after washing. Many users save time by fixing screen protector bubbles without removing them. A glossy, professional, bubble-free screen protector should boost usability.
Advanced methods to fix bubbles without removing
Screen protector bubbles are difficult to remove, but there are ways. Mild heat degrades adhesive, making screen protector bubbles easier to push out. Low-speed hairdryers may eliminate phone screen protect tips air bubbles.
It’s good that adhesives be flexible following tempered glass installation. Heat sources should be six inches away for safety. Other phone screen protection suggestions include gripping with a slightly wet microfiber cloth. Misalignment may produce bubbles, thus screen protector alignment is crucial.
Some prefer more gadgets. One smooth stroke with suction cups and rollers lets experts apply screen protector without bubbles. These may eliminate air pockets later. Fixing screen protector bubbles without uninstalling requires patience. A gentle, repeated stroke usually works.These revolutionary methods provide bubble-free screen protector clarity regardless of fault persistence.
Tools that make the job easier
Don’t fight bubbles on screen protectors alone. Many kits include screen protector bubble-fixing attachments. If you often remove air bubbles from phone screen protector edges, good equipment may save you from frustration.
Most sets feature an alignment frame for tempered glass. Straight posture is the best phone screen protection method, say experts. Ideal fit reduces gaps, and screen protector alignment prevents air pockets. Simple screen protectors like microfiber cloths, alcohol wipes, and dust stickers work.
Pressing cards are helpful also. Put bubble-free screen protector on and smooth adhesive. Many of these items can fix screen protector bubbles without removing the coating. Pressure must be light and consistent.Accessories improve your chances of a bubble-free screen protector. DIY solutions are conceivable, but professional kits are cheaper, faster, cleaner, and more reliable.
Common mistakes during installation in Screen protector tools
Many users have problems eliminating bubbles from screen protector layers due to installation mistakes. Poor screen cleaning is common. Lint or dust may resurface as black patches once screen protector bubbles are fixed. Phone screen protector edges may have air bubbles if not cleaned beforehand.Tempered glass installation speed is another issue. Many apply pressure quickly, thinking it would solve everything. Slow and steady application works best. Avoiding fans and wind, washing hands, and cleaning the workspace reduce phone screen accidents. Screen protector misalignment is another mistake. A slightly bent protector catches air no matter how hard you press.
Screen protector tools are also overlooked. Installing screen protectors without bubbles requires stickers and cards. Rushing or skipping processes may need screen protector bubble repair without removal. Bubble-free screen protectors that suit phones are best; prevention is better than repair.
Prevention strategies for a bubble-free finish
Avoiding screen protector bubbles is best. Arrange your environment first. Screen protector bubbles may be avoided in dust-free environments. Experts recommend placing phone screen protector films in a steamy bathroom to remove dust-induced air bubbles.Lay your phone flat to install toughened glass. Keep motionless. Time is essential for phone screen protection. Rushing collects air and misaligns screen protectors. Screen protector wipes and dust stickers save time.
Bubble-free screen protector application requires pressing from the center outward. Cover the surface softly and evenly. Don’t worry if anything goes wrong. Screen protector bubbles may usually be corrected without removal by pressing or elevating a corner.Repeating these steps will make bubble-free screen protectors automatic. Smoother apps increase display clarity and scratch and impact resistance.
Why tempered glass is different from plastic films
Many wonder why screen protector films bubble less than glass. Actually, both materials behave differently. Screen protector bubble repairs are weaker and dustier with thin plastic. Thus, phone screen protector films often acquire air bubbles after a few weeks.Tempered glass improves screen adhesiveness. Afterward, intense pressure is less needed. Phone screen protection methods include washing and working softly improve results. Most screen protector alignment frames include glass protectors, making insertion straightforward.
These tools don’t usually include plastic covers, making first-time bubble-free application harder. If problems arise, both may be changed. Screen protector bubbles can usually be rectified without removing the glass, however plastic may need to be replaced sooner.Finally, tempered glass offers a bubble-free, durable screen protector. Clarity, comfort, and durability are worth it.
Dust bubble removal step-by-step
Screen protector bubbles and dust bubbles sometimes need to be handled. When squeezed, dust particles don’t move like air pockets. Dirt leaves air bubbles in phone screen protector, against users’ expectations.Lifting one corner gently works best. Gradual tempered glass installation protects the adhesive bond. The bundled dust-removal stickers are a great phone screen protector. Scrape dust off with the sticky side, then carefully drop the glass. Screen protector alignment improves sealing.
Make screen covers using tape without accessories. Still, professional stickers are safer. Apply screen protector without bubbles from center outward after dusting. This typically resolves screen protector bubbles without removing the sheet.The reward is a clean, professional-looking, bubble-free screen protector that feels new without changing.
Realigning a protector without causing damage
Unstraight protectors complicate matters. Can bubbles from crooked screen protectors be removed? Misalignment creates pressure gaps, making screen protector bubbles hard to fix. Uneven air bubbles on phone screen protector borders indicate tilting.Only one perfect shot is attainable during tempered glass installation, however rectification is possible. To protect your phone screen, operate lightly. Avoid abruptly removing one glass side. Reposition screen protector edges gently.
Clean hands or use screen covers to avoid fingerprints. Press evenly to apply screen protector without bubbles when satisfied. Even if air pockets remain, use a microfiber cloth or squeegee to fix screen protector bubbles.This time-consuming technique saves protectors. The result is a smooth, robust, bubble-free screen protector that looks and feels professional.
Professional vs DIY installation methods
Many people debate whether to remove bubbles themselves or pay pros while installing screen protectors. Though cheap, DIY screen protector bubble repair may hurt. Professionals reduce phone screen protector film air bubbles using particular methods.Dust-free tempered glass installation is typical in stores. This simplifies phone screen protection standards and aligns protectors. Screen protectors are applied bubble-free using suction trays and air rollers.
DIY methods have been improved. Most screen protectors include alignment frames, cleaning kits, and anything else required to fix bubbles without removing the sheet. Anyone can master a home project with practice.Depends on trust and convenience. Professionals assure bubble-free screen protectors, while DIY saves money and gives you control. When they grasp it, techies prefer doing it themselves.
How long bubbles usually last if untouched
Popular question: when to naturally remove bubbles from screen protector layers without doing anything. Truth needs protectors. People assume time will fix screen protector bubbles, but only air pockets do. When adhesive distributes evenly, phone screen protector glass air bubbles may disappear after days.
Waiting won’t remove tempered glass installation dust. Protecting your phone screen with stickers or tape needs precision. Perfect screen protector alignment impacts bubble removal time.Default settings may work without pricey screen protectors. Daily gentle pressure may apply screen protectors without bubbles. If days pass with no change, repair screen protector bubbles without removing everything to prevent permanent marks.Above all, don’t worry. Patience pays off as many patients’ displays have nearly no bubbles after a week.
Troubleshooting stubborn edge bubbles
Screen protector glass edge bubbles are hardest to remove. These don’t always fix center screen protector bubbles with slight pressure. Air bubbles appear in phone screen protector corners due to incorrect sealing.Tempered glass installation may suffer from temperature changes. Heat expands glass, causing holes. After installation, press firmly around the edges to prevent this. Another method is matching screen protector corners with alignment frames.
Problems may need a rubber roller or screen protector. Sealing edges prevents bubbles while applying screen protectors. To fix screen protector bubbles without removing it, raise a corner and push down.Though annoying, obstinate edge problems don’t compromise your protection. With care, you may achieve a clean, durable, bubble-free screen protector that lasts months.


